- Use a melon baller or tiny scoop to remove a “cap”
- Fill the cupcakes with prepared Coco Lopez filling
- Top the cupcakes with the “cap”, sealing the hole
- All capped off and ready for topping
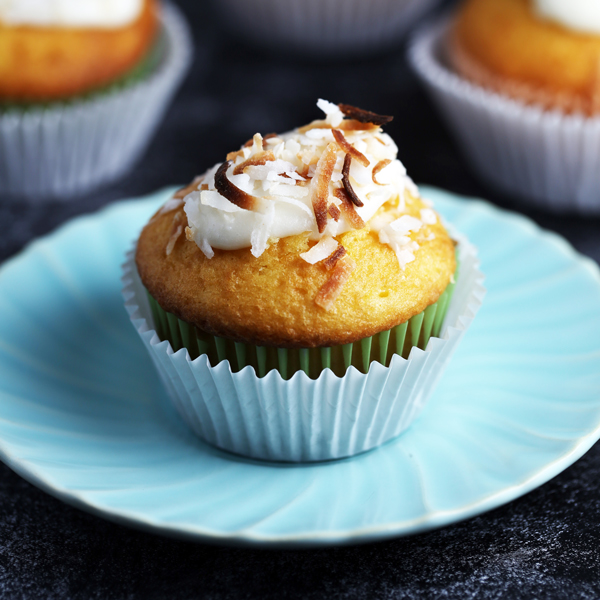
- Top each cupcake with a dollop of the filling, and a sprinkle of toasted coconut
- Ooey gooey center of Coco Lopez Cupcake
Out of This World
If you were Martian, recently arrived in the U.S., and you wondered what power source energized our population, you might get the notion that it is cupcakes. One peek at Pinterest most popular posts puts every other category to shame. Eat dessert first? Please. Eat dessert, then eat dessert again is more like it.
Curmudgeonly rant aside, I do loves me a cupcake every now and again. And what is it about Springtime and Easter that has me craving coconut? It’s definitely not a local food, nor is it seasonal, other than being the time of year I usually buy a bag of shredded coconut. For me, coconut is a flavor symbol for fresh air, newness and all things happy.
I wanted to make some extra ooey-gooey coconut cupcakes to take as a picnic dessert for the college kids I have in Austin. My absolute favorite coconut product is Coco Lopez, which is a sweetened coconut concentrate we always used to make Piña Coladas back in the 1980’s. I wanted to make a filled cupcake, sort of like those packaged truck stop chocolate cupcakes with the loopy frosting decoration, but the coconut version. Mission Accomplished, or Yum! I Did It Again…
Coco Lopez Cupcakes Hit the Spot
Coco Lopez, on its own, has a rather greyish color which is not particularly a cup-cakey hue. But add some cream cheese and it becomes a soft white filling that hits the spot. And with the frosting on the inside, these cupcakes arrived at the picnic in good shape, with no signs of travel. (They were transported in a shoe box…)
Not every recipe has to have a pedigree or a historical heritage. Sometimes I just cook for sheer pleasure. This is one of those recipes. I hope you enjoy it, and if a Martian stops by, you will most definitely be prepared to offer an authentic Earthling meal.
Coco Lopez Cupcakes
Sweet, coconut filled cupcakes are luscious picnic treats!
- Prep Time: 20 mins
- Cook Time: 30 mins
- Total Time: 50 minutes
- Yield: Makes 24 cupcakes 1x
- Category: Dessert
- Cuisine: Latin Inspired
Ingredients
- Cake:
- 24 cupcakes made with 1 box of yellow cake mix (follow box instructions) *
- Garnish:
- ¼ cup sweetened shredded coconut for garnish (15gr)
- Filling:
- 15 oz. can Coco Lopez (425gr)
- 12 oz. whipped cream cheese (340gr)
- 2 cups powdered sugar (250gr)
Instructions
- *Our box of cake mix required 1 cup (240ml) of regular tap water, which we replaced with 1 cup (240ml) of coconut water, with excellent results!
- For the toasted coconut garnish, simply place the shredded coconut in a small pan, and place under the heated broiler in your oven. Toast the coconut for about 2 minutes, until some of the shreds are deeply brown. Remove the pan from the oven, toss to mix, and return to the broiler if the coconut still needs more toasting. Once the coconut is toasted to your liking, remove from the broiler and set aside to cool.
- For the filling, place the Coco Lopez, whipped cream cheese, and powdered sugar in a large mixing bowl, and beat with an electric mixer until smooth.
- Using a small scoop or a melon baller, scoop out a deep, single scoop from the top of a cupcake, and set aside. This will be your “cap.” Using the scoop, remove more of the interior of the cupcake, about 2 tsp. of cake, which can be discarded, or eaten as a snack.
- Using a teaspoon, carefully spoon about 2 tbsp. of filling into the hollow cupcake. Place a “cap” back into the filled hole. Repeat with the remaining cupcakes. Cover each cupcake “cap” with 1-2 tsp. of filling, and garnish with the toasted coconut.







You could use the leftover cake parts along with any leftover filling and mix together to form cake balls and then roll in the toasted coconut -just and idea. I love coconut and will be making these soon.
That’s a good point. I will try that. I really liked this filling, and I think it would work with leftover poundcake. The trouble is we never have leftover cake around here! LOL! mg
What kind of coco lioez the milk or cream of coco lopez. Love my coco lopez
Hi, look for the Coco Lopez that they sell near the bar mixers at the grocery store. It is a coconut cream, my favorite!!
MG